Starfish Therapies

December 30, 2017

Top Ten Blog Posts of 2017

2017-03-28 23.24.31

It’s been a few years since we did a top ten list at the end of the year (that may be because for a few years we weren’t very consistent with posting). Since we managed to get out a post every week of this year (yes, we are patting ourselves on the back) we thought we would take a look back and see what posts were the most read by you our readers!

Here are our top 10 overall from 2017:

10.  Encouraging Rolling From Back to Stomach

9.  What Does High Tone Mean?

8. Easter Egg Hunt For Motor Skills

7.  Having a Ball with Core Muscle Strength

6.  Avoiding the ‘Container Shuffle’ with Your Baby

5.  My Child Isn’t Rolling Over:  Should I Be Concerned?

4.  A Multi-Tasking Activity

3.  A Glossary of Sitting

2. What Does Low Tone Mean?

1.Motor Learning: Stages of Motor Learning and Strategies to Improve Acquisition of Motor Skills

Interestingly enough, all of these were published prior to 2017, so I decided to dig a little deeper and find out our top ten that were published in 2017. Those are:

10. Halloween Inspired Gross Motor Games

9. Single Leg Stance

8. Transitional Movements

7. 10 Things You Didn’t Know a Pediatric PT Could Help With

6. Crossing Midline

5. Taking the Vision out of Balance

4. Core Workout: Hungry Hippos Meets Wreck it Ralph

3. Eccentric Abs (and no, I don’t mean odd!)

2. Ideas to Target the Core

1.Righting Reactions

Happy New Year, thanks for a great 2017 and we look forward to seeing you in 2018!

December 16, 2017

What is Core Strength?

therapy ball

Why are pediatric PTs always talking about core strength and what does that term that is thrown around so frequently even mean? And is core strength the same as trunk strength and is that the same as core stability? Hopefully, this brief overview will help to clear the air!


Core: When we think of the “core” of the body, our first thought is the abdominal musculature.  While the abdominals play a crucial role in all of our functional movements, they are just one of the many important muscle groups that make up the “core.” We can also add shoulder, scapular, back, and hip muscles to the list. We can think of anything from the neck down to the upper leg as part of the “core.”


Core Strength: Core strength refers to the ability of the indicated muscle or muscles to perform as movers. For example, a sit up or moving from extension to flexion requires core strength.


Core Stability: Core stability refers to the ability of the indicated muscle or muscles to perform as stabilizers, therefore, preventing movement of a joint or joints. When we are referring to core stability, we are most often referring to how well the core muscles can work to prevent unwanted movement of the lower part of the spine and pelvis. For example, when we squat to pick up our kids, laundry baskets or grocery bags, we want the abdominal muscles to work as stabilizers to prevent unwanted movement of the lower spine.


Trunk Strength/Stability: Okay, okay, so what is trunk strength? Well, as pediatric therapists, we often use the term “trunk” and “core” interchangeably. They are just two different terms that mean the same thing. So, if you see both terms in a report or other documentation pertaining to your child or yourself, feel free to ask us! Most likely, we are talking about the same thing but we strive to improve our consistency and you can help by bringing it to your attention.


For more information on the importance of the core musculature as well as for tips/ideas on how to improve the function of the core, take a look at some of our previous blog posts.


Core Strength – Building a Solid Foundation


Core = More than Just Abs


Having a Ball with Core Muscle Strength


October 29, 2017

Core Workout: Hungry Hippos meets Wreck it Ralph

I happened to walk by another one of my therapists using a really fun and creative way to work on core strength with kids. I know I have done my share of walkouts over a ball or peanut with a kiddo but this was so much more fun. In addition to working on the core, it also works on upper extremity strength, shoulder stability, and motor planning.

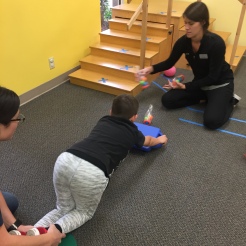
She helped to stabilize his feet on the ground while both of his hands were on a scooter board. There were several bowling pins set to the front and to an angle from the kiddo. He had to hold his core tight while pushing the scooter board out to knock over the bowling pin and then bring the scooter board back. The goal was to see how many he could knock over at a time. They had a target number and he ‘won’ that round if he hit the target number. You can always tell when a game is fun when they want to do more rounds even though they say on one break ‘this is hard.’ I’m pretty sure I would have trouble doing even one repetition!

Here is a brief video of the activity.

Has anyone else tried any other variations of this? We’d love to hear about them.

September 21, 2017

Wheelbarrow Walking

wheelbarrow walking

Do any of you remember doing wheelbarrow races as a child? I do! I remember thinking it was hysterical that someone was holding my feet and I was racing someone else on my hands. Well, as much fun as that was, wheelbarrow walking is actually a great tool to incorporate with kids to help them get and stay strong.

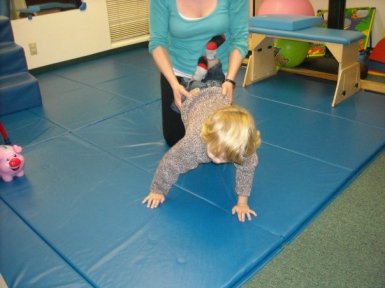
Wheelbarrow walking works on strengthening the arms and the core. It can also support coordinated activity because of the need to walk reciprocally on their hands, while keeping their head up to see where they are going, and keeping the core muscles turned on so that the person holding their feet can better support them.

I am a big fan of multi-piece toys such as puzzles and shape sorters. They naturally build repetition into an activity. For instance, you can put the puzzle at one end and the pieces at another end. Place one puzzle piece on your child’s back just like they were a wheelbarrow picking up a load. Then have them walk on their hands to the other end to put the piece in the puzzle. Turn around and head back for the next piece. Keep repeating until all the pieces are replaced.

So how do you vary this by child? That’s easy!

  1. Distance to walk – Start with shorter distances. If they are doing really well you can increase the distance by moving the puzzle board just a little further away.
  2. Number of repetitions – Start with carrying just one piece back at a time. If they seem to be tiring, start adding more than one piece to the wheelbarrow. This way they still complete the puzzle but you have decreased the number of repetitions.
  3. Where you are holding them – The closer to their arm pits you provide support, the easier it is for them. The closer to their ankles that you provide support, the harder it is for them. Just like goldilocks and the three bears, you want to hold them in just the right spot. This means that they can walk on their hands without letting their belly sag towards the ground. If you see their belly sagging (or back arching) you may want to move closer to their arm pits. Once they have mastered keeping their core strong, you can slowly move closer towards the ankles.

There are other variations to make this fun besides just completing a puzzle or a shape sorter. Here are a few ideas I had:

  1. Treasure hunt – Start with a treasure list and have the items hid in the room that you are in. Have them walk on their hands to collect the treasure. They can hold the items in the ‘wheelbarrow’ while they collect each of them.
  2. Race track – Create a race path that is clearly marked and use a stop watch to see how fast they can get around the race track. If they have to pause on the track it’s like taking a pit stop. Clearly, they’ll want to take less pit stops to get faster times. Be careful they aren’t going so fast that they start to sag at their core.
  3. Staying in place – Rather than walking on their hands, have them assume the position and put papers with different colors or letters or numbers in front and to the side of them. Call out a color (or number or letter) and have them use their hand to touch it. You can get tricky by telling them what hand to touch it with (similar to twister).
  4. Going backwards – You can do almost any of the above ideas backwards. It’s a great way to make the activity novel. You can also combine forward and backwards to make it extra tricky!

Since you are the one that will be helping, you want to make sure to take care of your back as well. Be careful that you aren’t bending over to support them. Use a rolling stool or a scooter board, or walk on your knees (but I would recommend knee pads if you are going to be doing this a lot).

June 18, 2017

Pop Goes the Bubble

Filed under: Developmental Milestones — Starfish Therapies @ 12:03 am
Tags: , , , , , ,

Who doesn’t love bubbles? A lot of the kids we work with do! Here are some things that you can work on with bubble play:

  • Reaching – You can do this in almost any position.
    • Sitting – For little ones just learning to sit you can start by blowing bubbles all around them and having them move their arms towards them. As they get a little more stable you can blow the bubble and catch it on the end of the wand and hold it further away from them so they have to reach outside their base of support. You can have them reach up, forward, to the side, across the body, diagonal, pretty much any direction! For kids who are sitting in chairs you can do this as well. Make it even more difficult by putting them on a bench where their feet don’t touch, or on an unstable surface like a peanut, therapy ball, or dynamic sitting cushion. If you want to control the challenge, you can have them sit on a therapy ball and change their position while they try to reach. This can really work on the core muscles.  Make a game out of it, see how many bubbles they can pop in a minute. Then you get some counting in too!
    • Standing – All the same ideas as above except in a standing position. You can use spots to help them keep their feet in place so they have a smaller base of support, or you can use more than one spot so you are changing their foot position while they reach. Maybe even use a twister board and have them change their foot position and each time they have to pop a bubble. You can make it more challenging by having them stand on a balance board, a bosu, a dynamic disc, on top of stepping stones, on a balance beam, the possibilities are endless. You could also have them stand in more challenging positions such as tandem stance or single leg stance while reaching.
    • Kneeling  – The same ideas apply to kneeling. You can do short kneeling, tall kneeling, half kneeling. Change the surface, change the leg position, etc.
  • Single Leg Stance – What better way to pop bubbles than with your feet? Bubbles are a great way to get kids to stomp and when they are purposefully stomping they are generally holding their foot up a little bit longer than if they are just walking. Also because they are trying to stomp on the bubble they are more deliberate and trying to find their balance. You can have them go one bubble at a time (possibly holding it on the end of the wand) or you can blow a whole bunch and have them stomp through the bubble fields. You can make it more challenging by having varied surfaces that the bubbles are on so they have to stomp up onto a step or onto a mat, or down onto the ground from a slightly elevated position.

  • Squatting – Great time to get in squatting practice, or floor to stand/stand to floor practice. If you blow the bubbles towards the floor they may attempt to get to them with their hands. Then the next time you blow them up high and have them stand up for them. As long as they are entertained, you can get a lot of reps in this way! If the bubbles aren’t going where you want then you just need to catch it on the wand and hold it down low or up high for them to try to pop.
  • Other – There a ton of other things too such as oral motor control from blowing the bubbles, and breath control for the same reason. Visual motor, Fine motor control, and coordination for dipping the wand into the bubble juice and bringing it to their mouth.

What are some of the things you work on with bubbles? What are your favorite activities?


May 14, 2017

Ideas to Target the Core

wheelbarrow

bridging

modified plank

I don’t know about you, but I know my core muscles (abdominals, back extensors, shoulder girdle, and hips) can always stand to be stronger. This also goes for our kids, typically developing as well as kids with a neuromuscular challenge. While there are lots of ideas for targeting specific muscle groups, sometimes its good to do exercises that get a bigger bang for their buck. There are some exercises that can target multiple areas of the core at the same time. Here are a few:

  • Planks – Planks are great for getting all areas of the core. Of course they are not easy, especially if you want to maintain good form. For those just starting out with a plank you can go on your hands and knees and bring your hips in a straight line with your trunk. To make it harder to you can move to your hands and toes (or forearms and toes) and keep your whole body in a straight line. To make it even easier, you can use a bench or a table and put your hands on there so you are at an incline. The goal is to be able to hold your body in a straight line without having your belly sag or your hips sticking up in the air. Find the level of difficulty that lets you maintain that straight body. And start small. If you can hold it for 15 seconds then do that. Slowly increase your time and then increase the difficulty!
  • Wheelbarrow Walking – This also targets multiple areas, the hips don’t get as much work unless you are being supported by the ankles, but its still great for the shoulders and trunk. You can use a scooter board and sit on it and hold them by their trunk, or their hips, or their thighs, or their ankles (the further out you hold them, the harder it is). Use a hallway and have something fun like a book or a puzzle at the end that they get to do something with each time they get down there. You can also use a rolling stool. This changes the angle and makes it harder. Even harder is you just standing and walking while supporting them. Again, the goal is to hold the body straight so find the level of support that allows them to do this and gradually work your way out towards their ankles and up to you standing!
  • Walk Outs – Use an exercise ball or a peanut ball or even a foam roller (the exercise ball will be the hardest because it can move in multiple directions). Place a puzzle and its pieces a little out of reach and have them lie on their stomach on the ball and then slowly walk out their hands as far as they can go while maintaining a straight trunk and hips. Then put a piece in the puzzle and walk their hands back. Keep repeating until all the pieces are done. You can also use beanbags, or other toys that involve multiple pieces.
  • Bridging – This one really targets the hips but also works on the trunk. I’ve talked about ways to work on this in other posts. You can get creative with how to make it fun, such as balls or cars going underneath. You can also make it harder by putting one foot on an elevated surface and the other one on the floor, or both feet on an exercise ball or peanut (or other unstable surface). You could just do one leg and keep the other leg up in the air. You can do reps of up and down, or you can go up and hold it for longer and longer periods of time.

What are some of your favorite ways to work on the whole core?

April 17, 2017

Hand and Foot Play

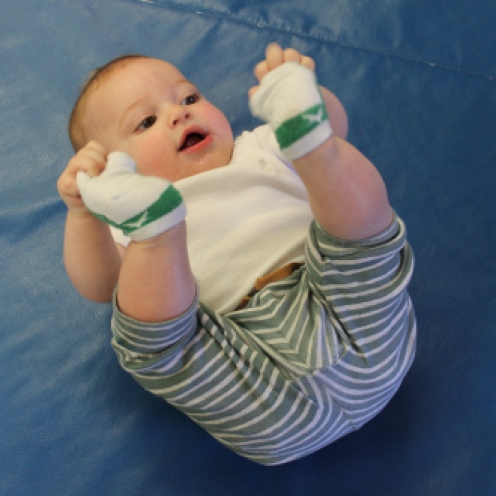
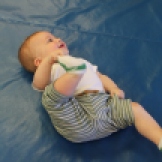
Hand and foot play is an important part of a child’s development.  So is bringing the feet to their mouth (unfortunately I didn’t get a good picture of that!).  So what are some of the reasons it is so important?

  1. Hamstring stretches – They just spent 9 months cramped up in the ‘fetal’ position. This means their knees were flexed and in close to the body. By reaching for their feet they are beginning to perform hamstring stretches that will help to lengthen the muscle.
  2. Core strength – By lifting their feet up and reaching with their hands, they are working their abdominal muscles which will help to develop their core strength. You try lifting both your feet up and reaching with your hands. Its not easy work on those abs!
  3. Midline – You can see in the pictures that they can bring their hands and/or feet to midline which helps to increase their awareness of where midline is.
  4. Body awareness – Hand and foot play allows your baby to explore their body and the various parts of their body. They begin to realize that their feet are attached to them and that their hands and feet can work together.
  5. Exploration – Once they are participating in hand and foot play, you will probably see them putting their feet in their mouth. This is how babies explore. They put everything in their mouth, including their own toes!
  6. Movement – As you can also see in the photos lots of movement is happening. He isn’t just lying flat on his back holding his feet. He is rocking back and forth, dropping one foot, picking it back up again, etc. This helps to create building blocks for movement and cause and effect. If they end up on their side, what do they have to do next?
  7. Self-soothing – When they are engaged in play with their feet, or putting their toes in their mouth, they are also able to self-soothe. This can help with sensory regulation.

If your child isn’t doing this, you can help to encourage them.  Gently bring their feet up towards their hands. Maybe help them to put their hands on their feet and try to grasp them. You can make a game out of it by playing peek-a-boo behind their feet so that their feet are in midline when you are ‘hiding’. You could also do ‘This little piggy’ while you have their feet up in the air and count each toe. You can play ‘patty-cake’ while holding their hand and feet together and bringing them to midline for each ‘clap’.

What are other ways you have encouraged hand and foot play?

August 13, 2013

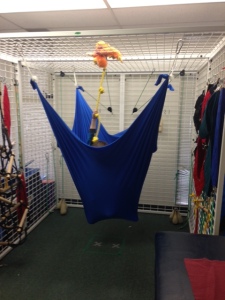
Rope Climb – With a Lycra Swing Twist

Filed under: Developmental Milestones — Starfish Therapies @ 7:00 am
Tags: , , , , ,

Rope Climb

A great way to work on core and upper body strength, as well as bilateral hand use is to put your climbing rope in a lycra swing.  Its really hard to get any traction/stability from your feet and you get to rely on upper body and core strength to get yourself up high enough to rescue the monkey!

The kids find it to be hard work and are often exhausted after doing this activity but they get a great workout with it.

What are some variations that you can think of?

November 5, 2012

Core Strengthening with a Tunnel

Filed under: Developmental Milestones — Starfish Therapies @ 12:00 pm
Tags: , , , ,

We love tunnels and our kids love tunnels so we often find ways to incorporate them into therapy.  We have standard tunnels with a ‘solid’ form and we have lycra tunnels that provide resistance that the kids have to work against.  I thought I would take a moment and share one of the activities that we use our tunnel for to work on core strength (primarily) but other things as well.

We love to put the tunnel over top of our crash pad, although you can use pillows or couch cushions instead.  Then we have them crawl through the tunnel over the crash pad.  Often times they won’t be able to maintain hands and knees because it is a bit challenging but with practice their core gets stronger so they can crawl all the way through.  If you have them doing reps you may notice that they will start off maintaining hands and knees but with increased repetitions they aren’t able to maintain it.  This is because they don’t have the endurance in their core muscles to complete higher number of reps.  Since core muscles are mainly used in an endurance type fashion, to help keep our trunk stable as we go about our day to day activities, making this a high repetition activity is a must.  We use puzzles or toys with multiple pieces to keep the kids going over and over and over.

Some things to consider when you are setting up.  The softer the surface, the harder it will be for the child.  If you want to ease them into it find something that is a little firmer.  Next would be the steeper the incline or decline the harder it will be.  For a kiddo just starting out using a flatter surface will be easier.  You can also start them out on softer and steeper and as the repetitions increase make it firmer and flatter.

In addition to working on core strengthening it also gives kiddos a chance to crawl which many kids skip in this day and age.  With crawling they get to work on motor planning between their left and right sides as well as between their arms and legs and use reciprocal patterning.  All in all we love this activity!

How have you used tunnels?


June 20, 2012

Lycra Tunnel

Our newest toy at work is a lycra tunnel.  One of our OT’s had been talking about wanting one so I finally was able to buy her some lycra and she was able to make one for us.  Of course we all needed to try it out ourselves and let me tell you, its hard work!  Basically a lycra tunnel can be used to provide a kiddo with increased proprioceptive input, work on motor planning and provide them with a core workout.  To make it more challenging you can put a ball in and have them push it through.  The larger the ball, the harder it is.

In terms of motor planning it is challenging to figure out how to move when you are receiving input from all sides which is what this tunnel does.  It provides proprioceptive input all around you as you move through.  I made it about halfway through before I needed to lie down and rest!  The larger the child is the harder it will be also.

When a kiddo is using it you can pull on the back of it so they can advance their legs easier.  In addition, to make it more taut you can have someone pulling from the front as well, or just being at the other end to show the kiddo where the end of the tunnel is.

What else do you use a lycra tunnel for?

Next Page »

Create a free website or blog at WordPress.com.