Starfish Therapies

October 15, 2012

Development of Writing Utensil Grip

Filed under: Developmental Milestones — Starfish Therapies @ 12:00 pm
Tags: , , ,
Another article by one of our OT’s.
As children are getting back to school, we often hear questions about children’s writing utensil grasps. Teachers may point out the way a child holds a crayon or pencil, or parents may take notice when one child doesn’t follow the same pattern as older siblings. But why is pencil grasp so important? The quick answer is: the way a child grasps a writing utensil affects his or her efficiency and accuracy. It follows then, that if the child perceives handwriting as a particularly difficult, tedious, or even painful task, they are more likely to have decreased confidence in their performance and this might affect willingness to engage in writing necessary for school or other everyday tasks.

But how do you know whether your child’s grasp is appropriate? The first thing to recognize is that children’s development of writing utensil grasp tends to follow a particular progression. Toddlers first grasp a crayon or marker by wrapping their whole fist around it, and scribbling with the pinky side of their hand toward the paper. This is called a palmar supinate, fisted, barrel, or cylindrical grasp, and it tends to begin around 12-16 months and is illustrated below.

Next, as children experiment with grasp and develop more dexterity in their forearm, wrist, and hand, they learn that they get more precision by turning the palm downward, with the pointer finger toward the pencil tip and the paper. This is called a digital pronate grasp and can be expected to emerge between the ages of 2 and 3.

Later, as the many small muscles of the hand develop increased strength and coordination, the child develops what is known as the static tripod or quadrupod grasp, in which the thumb is opposed to the next 2 or 3 fingers, with the pinky side of the hand toward the paper and the top of the pencil extending up from the space between the thumb and index finger. This grasp generally emerges somewhere between 3-4 years. Finally, as the child develops even more dexterity, the grasp becomes a dynamic tripod or quadrupod, in which the pencil is held in the same general orientation as the previous grasp, but the wrist and fingers are now able to create small, refined movements rather than depending on using the arm as a whole. This grasp tends to develop between 4 and 6 years of age.


When to consider OT

Just because your child’s grasp doesn’t follow the developmental pattern above does not necessarily mean they will have problems requiring intervention. There are other grasps that may also be considered functional, and there are children with appropriate grasps that still develop problems due to other factors. Your OT can help determine the best way to help your child develop a functional grasp, including working on other factors that may help, such as posture, adaptive aids, or strengthening activities. Here are some other things to look for that might signal a problem worth looking into:

–       Child frequently putting utensils down to wiggle or shake out fingers

–       Writing that is too light or too heavy (i.e. too light to read, or heavy enough to break the pencil/crayon)

–       Writing with arm not resting on the table

–       Using the whole arm to write rather than wrist and hand movements

–       Poor posture

Please don’t hesitate to ask your therapist if you are concerned about your child’s writing utensil grasp- we’re here to help!

September 14, 2012

Pringles Can and OT

One of our OT’s and her student came up with this idea that they have been loving using!  They took a pringles can and decorate it (optional) and in the top they cut two holes.  One was a small round hole and the other was a slot.  They then used wooden sticks and buttons to put into the holes.  Here are a few of the things that this activity can work on:

  • visual motor skills – to line up the items and get them in the hole (similar to shape sorters)
  • grasp patterns – the most efficient grasp for this activity is the pincer grasp so the child can practice this
  • problem solving – the child gets to figure out which item goes in which hole as well as how to line them up so they fit in the appropriate hole
  • I don’t have a great header for this one but when the item drops into the Pringles can it creates a sound that can provide auditory feedback for the task as well as potentially allow kids to work on tolerance of auditory stimuli if they have sensitivities

What ideas have you used a Pringles can for?

August 27, 2012

A Clean (but potentially wet) Mess


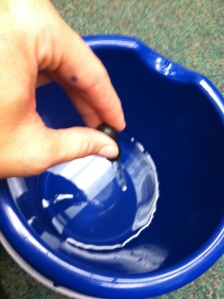
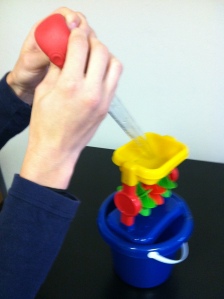
Here is an activity that our OT’s have been using with the kids.  The OT’s like it because it works on specific skills and the kids like it because its water play and they think they are making a mess!

Materials: turkey baster, bucket, eye dropper, water

Activity: squeeze baster/eye dropper in bucket of water to make bubbles (or streams of water or drops of water).

Benefits:

  • hand strength
  • bilateral coordination – for smaller kids it may require two hands to squeeze the turkey baster and/or they need to stabilize the bucket they are using with one hand so that it doesn’t spill over and make a mess!
  • grasp patterns – use 2-3 fingers to grasp eye dropper and squeeze which can work on pincer grasp for two fingers and with three fingers it uses the same fingers as tripod grasp
  • grading of movement – if you fill the turkey baster with water and have them try to squeeze it into a smaller container with water, if they squeeze too hard it will spill the water whereas if they grade their squeeze they can keep the water in the container
  • visual motor – having kids aim baster/eye dropper into a small bucket or at target
  • sensory – hands may not get wet from touching the turkey baster or eye dropper but the kids will most likely put their hands in the water bucket… ( a clean mess)
  • sequencing – placing eye dropper under water, squeeze eye dropper to collect water in dropper, take dropper out of water and squirt

What other things have you done with water and droppers/turkey basters?

June 5, 2012

What are 4 things playing Connect Four can help?

Filed under: Developmental Milestones — Starfish Therapies @ 12:00 pm
Tags: , , , ,

image retrieved from: amazon.com

Connect Four is a game that I used to love playing as a kid!  However, now that I am working with kids I realize how much more it can be than just a game (while your kids think they are just playing a game).  Here are four things that playing Connect Four can work on:

  1. Pincer Grasp – Holding the chips can help to promote pincer grasp which is a mature grasp pattern.  It is possible to use other grasp patterns to pick up the chips as well as to hold it and put it in the slots but it is more efficient to use a pincer grasp and this is a game that can encourage that pattern.
  2. Visual Perception – Not only is this a game that requires planning but it requires being able to line up four chips of the same color in a row (horizontal, vertical or diagonal) but you can make it into a game that requires creating patterns.  You can do black and red patterns or use pictures of patterns and have the kiddos try to recreate the patterns.
  3. Fine Motor Control – In order to use this game it requires putting the chips into slots of a pretty specific size.  In order to do this the kiddos need to line up the chips and be able to purposefully release their grasp.  In order to encourage this for kids that are having trouble lining the chip up you could always create a funnel (flattened) that has a bigger opening to give the kiddos more leeway with accuracy.  You can decrease the size of the opening as they get more efficient until they are able to get it into the correct slots.
  4. Strategy – When playing the game the way it is meant to be played it requires kiddos to work on strategizing and using problem solving to come up with what move they want to make.  You can work on their thought process by asking them why as well as by letting them make moves and come up with what moves you might make.  It will allow them to work on thinking about what they want to do as well as what their opponent might do.

What things do you use Connect Four for?

May 15, 2012

Stickers – So Simple, Yet So Effective

When working with kids motivation is the key.  Depending on the day, the hour or the child that motivation could look different.  One of the simplest yet so effective methods of motivation are stickers.  Kids love them!  Not only are they great motivation but they actually work on skills and the child doesn’t even realize it (that’s my favorite kind of motivation)!

I’ve talked about using sticker charts before and we make use of them in many ways.  We have some kids who have ongoing ones that will result in something once it is all filled up.  One of these uses is where they have to earn a sticker each day for behavior/participation/etc.  Others have an ongoing one with tasks they are working on and each session they do the skill/task they earn a sticker until the whole chart is full.  Others have sticker charts for each session where they write down their tasks or they have a goal for a certain number of stickers and they get to put one on every time they accomplish what they were supposed to.  We also just hand out stickers at the end of the session sometimes and they love to wear it proudly on their hand or shirt or forehead occasionally!

Other than motivation you may be wondering what else the kiddo is working on.  Well here are a few things:

  • Bilateral Coordination – If they are peeling the sticker off they need to stabilize the paper with one hand while manipulating the sticker with the other hand.  Also for precision of placing the sticker they need to use a stabilizing helper hand as well.
  • Mature Grasp Patterns -In order to effectively peel off the sticker it works best with a pincer grasp.  They may evolve to this and you may need to help them by starting with larger stickers first and then working your way down to smaller stickers.  Also, in the beginning the more you start the peel for them the easier it will be for them to get it but eventually you want them to be able to manipulate the sticker off the paper by themselves.
  • Fine Motor Control – This goes along with both of the above points but it also takes control to put the sticker on the surface that they want, especially if they want it in a certain location.
  • Visual Motor -If you have a square on a chart or they are making a picture with stickers they get to work on visual motor skills and precision by placing the sticker in the correct spot.  To encourage success, start with larger areas and work your way down to smaller areas for them to place the sticker in.
  • Body Awareness -You can have the kiddo place the sticker on a specific body part for increased body awareness.  Its always interesting to see where the stickers end up when you say something like ‘place the sticker on your forehead’!
  • Counting/Reading – For the kids who are working on charts they always want to know how many they have or how many more they need so its a great opportunity to work on counting and one to one association because they will have to point to the sticker or empty space while they count.  Also if you have specific tasks/skills written down they can work on locating the word(s) for where to put the sticker.
  • Choices/Decision Making – We will also use letting the kiddo pick out their own sticker as another whole type of motivation.  Sometimes we pick it out for them but on some ‘special’ occasions we let them pick it out.  The thought process that goes into what sticker is pretty amazing and you can see them weighing the pros and cons of their sticker choice as they go through the sheets of stickers and decide yes/no/maybe for that sheet to narrow it down and then making the final decision.  Sometimes its based on what they like and sometimes its based on what is already on their chart and wanting just the right mix of stickers.

How do you use stickers?

February 8, 2012

Making a Torn Paper Owl – ‘Whooo’ Can Benefit

The newest pinterest project used in OT around here was making an owl out of torn paper.  It was posted from this blog that has a ton of crafts on it.  After completing the project, the feedback our OT gave on its benefits is below:

  • the cutting provides scissor skills practice as well as practice with visual motor skills and bilateral hand use (to hold the paper while cutting)
  • tracing the shapes works on pencil skills as well as grasp and more visual motor
  • having the kiddos put the eyes and beak on can work on body awareness and eye-hand coordination
  • tearing paper works on bilateral coordination of hands, motor planning and mature grasp

With the paper tearing what she really noticed is that some kids can have a really challenging time doing opposing motions with their hands.  Some of the kids just tried to pull their hands straight away from each other and had a hard time figuring out how to move one hand forward and the other hand backwards to create a tear.  Also by pulling their hands straight apart they were using an immature grasp whereas the opposing hand motions encourages a more mature pincer grasp.  Think of the fun your kids can have tearing paper!

Blog at WordPress.com.